As we move into the new year the hardest two years of my life are wrapping up. You’ll notice my last blog post was in 2017!!! And then I fell off the map into a renovation hole. I fully admire those that can take on a large renovation and share their progress with the world. I took on a large renovation and feel into the couch every night, too exhausted to think let alone emote. I am not a sharer by nature. If you want to know about me I’d much prefer to be asked. If no one asks I rationlize that no one cares and i don’t share. But not sharing what value I bring to the world has not been a successful business tactic. I am a artist, designer, and maker to the core and can contribute in valuably to the world but I need to let that world know what I do and where to find me. So here it goes, a 10 part series summing up the project that is 7124.
Part 1 – The Overall Plan
As I mentioned in my previous post from 2017 😛 our little 60’s bungalow was bought with a specific purpose in mind … creating an income property and secondly forcing as much equity as we possibly could. We toured so many houses and when we saw this one, we looked past it’s flaws and saw the potential. Now that its was ours, it was time to make a plan to deal with those issues and turn it into the diamond I imagined.
Coming up with the overall plan for the house took many MANY revisions and about 2 months of debate. I wanted the house to feel bright, spacious and welcoming with a little indoor/outdoor living thrown in. And because we were looking to increase value as well, the main floor kitchen and bathroom had to be where we would spend the majority of our budget. Downstairs, in the soon to be basement suite the theme was do as much as possible for as little as possible but don’t scrimp on sound separation! In the end we decided to save costs and move as few main elements as possible.

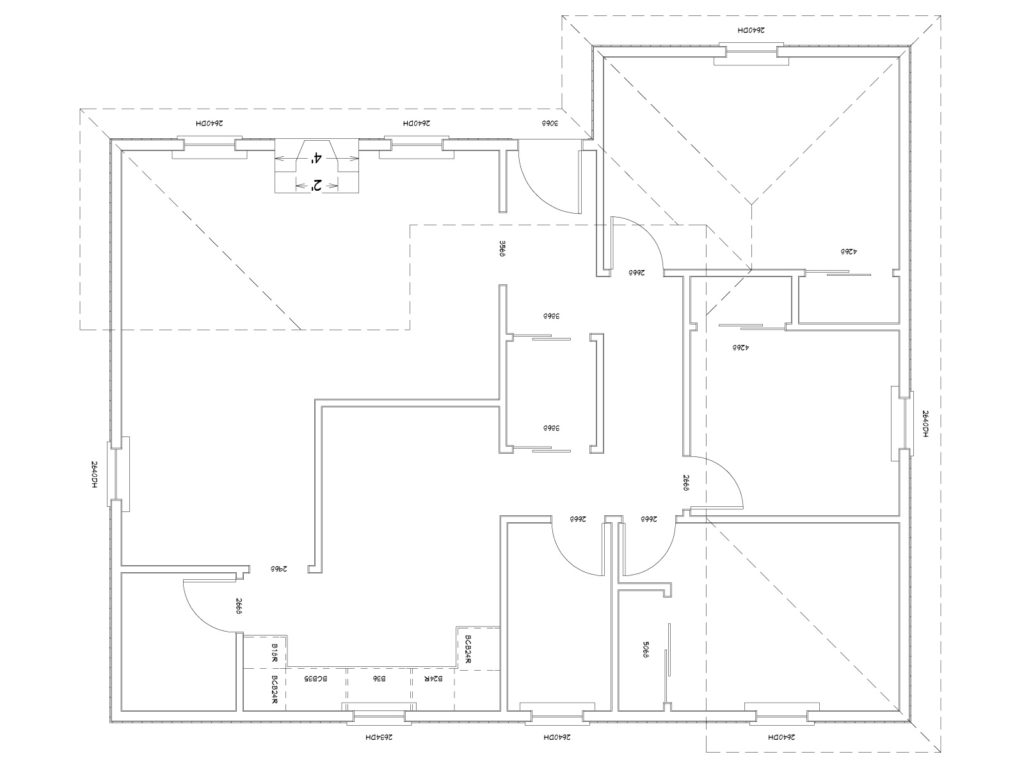
7124 as it was built had three bedrooms and one bath on the main floor, a small eat in closed off kitchen and an L shaped dining/living room. Our idea upstairs was to

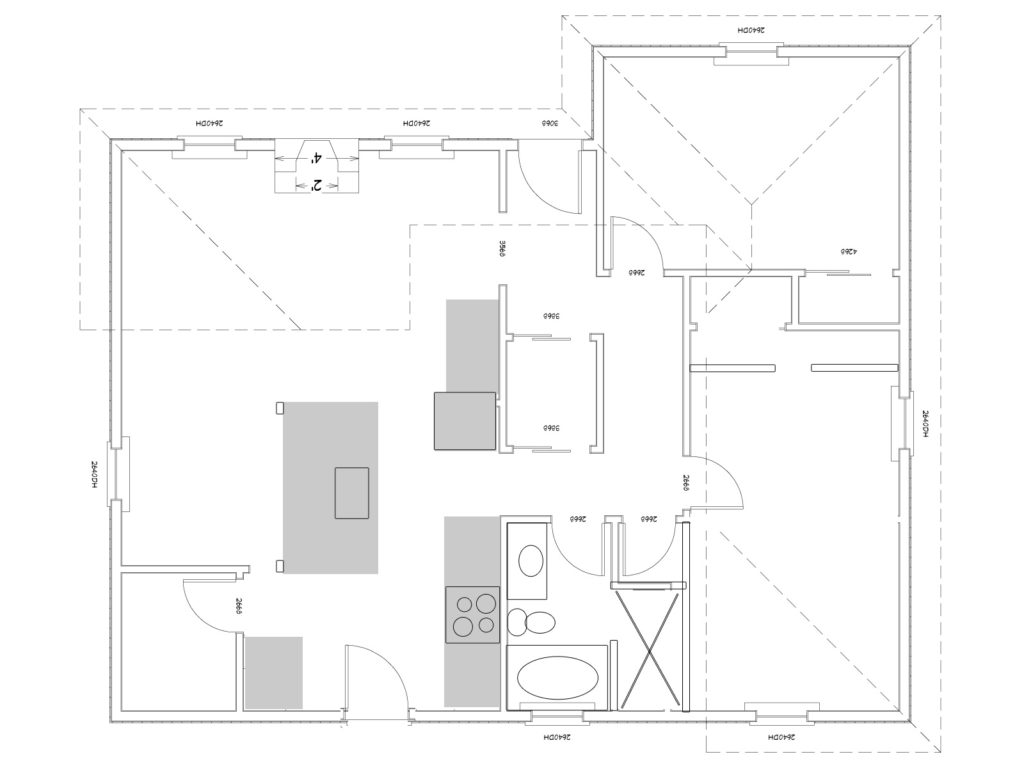
- blow out the wall between the kitchen and living room creating a “great room”,
- adding a exterior doorway in the kitchen connecting it to the backyard,
- move the master bedroom to the back of the house and enlarge it by combining two smaller rooms, and
- add a walk-in shower to the bathroom by stealing space from one of the bedrooms closets.

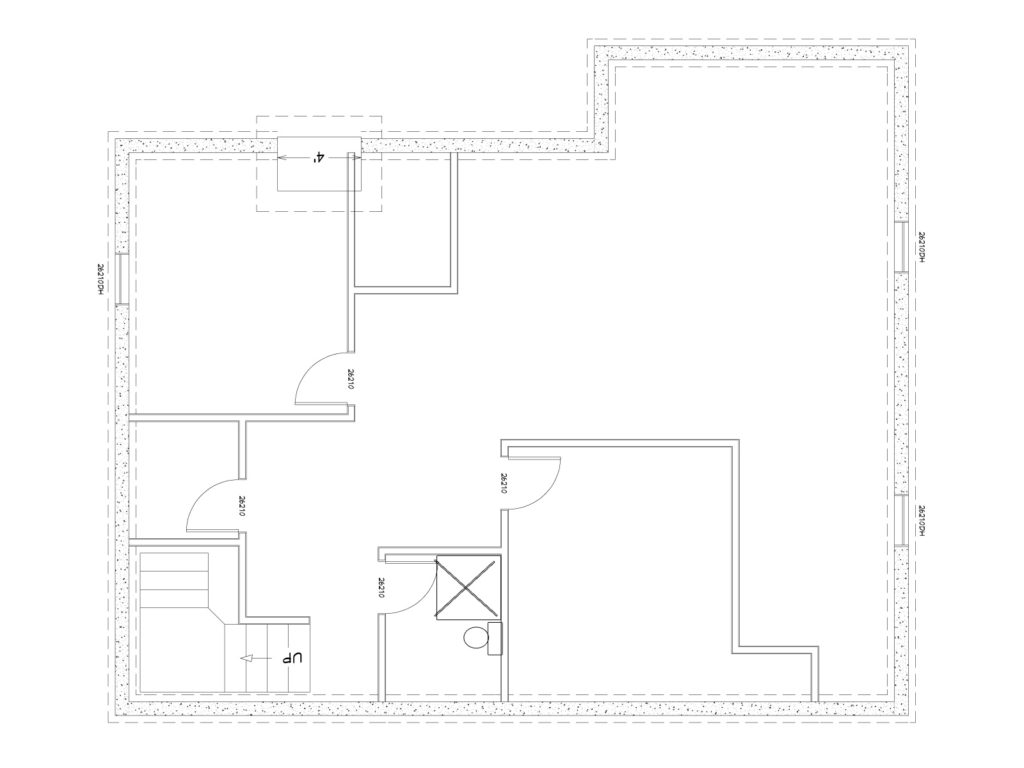
The basement had an old 70’s rumpus room feel with one bedroom, a tiny dungeon like bathroom and a large open area. Our plan for it was to;

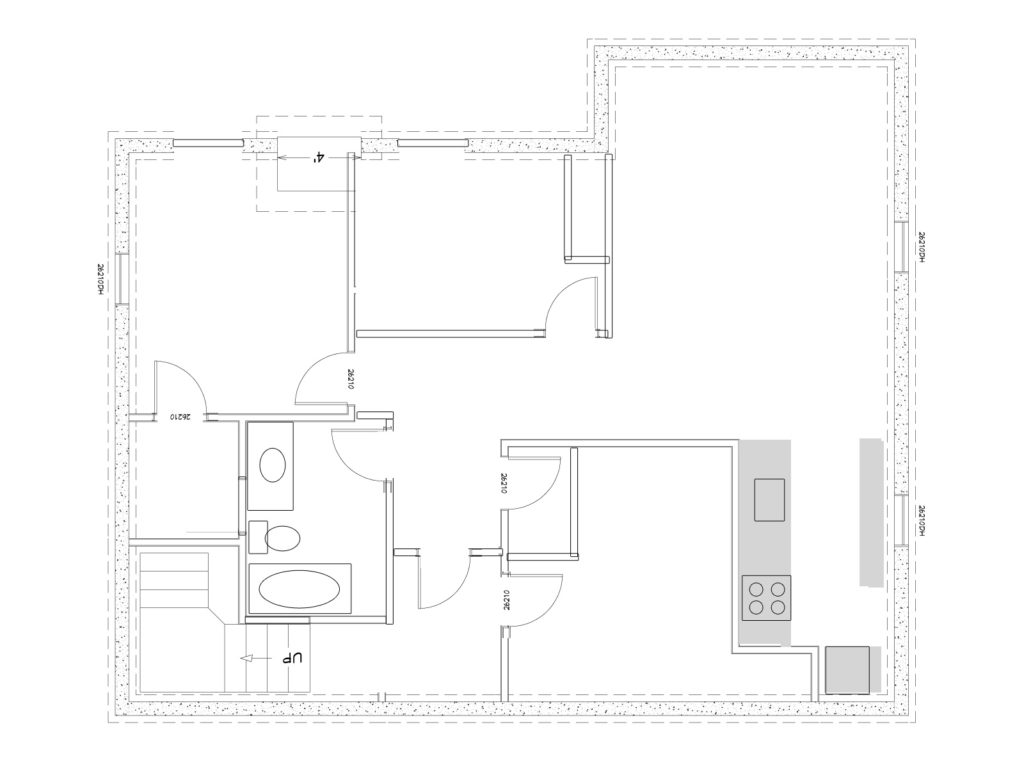
- Keep the one bedroom were it was but add another bedroom beside it
- Add an egress window to each bedroom to maximize light and make them safe
- Move the location of the bathroom so we could create a common hall which gave both suites access to the utility room
- Build a full galley kitchen in the back of the basement
- Turn the large rumpus area into a living/dining room complete with fireplace
It was an ambitious plan and it had to be done in stages starting with the basement suite first so it could generate the capital to renovate the main floor later. But through luck and the generosity of family we were able to do both renovations back to back. In hindsight we should have done the main floor first and then the basement, but we didn’t know we would have the money we needed to do the full job until the basement was already finished.
With our stage one city permits in hand we started ripping down ceilings in the basement and demoing a closet upstairs. Click here for the next post to see how we maximized the upstairs bath and gave it a little hint of spa.

Leave a Reply